Hello Trickers, How are you all ? You must be using your desktop or laptop since a long time. You are generally using Notepad to write something. But do you know that is not to store just your writing ? Yes, Notepad is more than writing and storing your text stuff. Here, We are going to share you 8 amazing notepad tricks that you didn’t know till now. There are some cool notepad tricks also from that you can amaze your friends. So, Are you ready to learn those Notepad hacks ?
Contents
Create Diary on Notepad
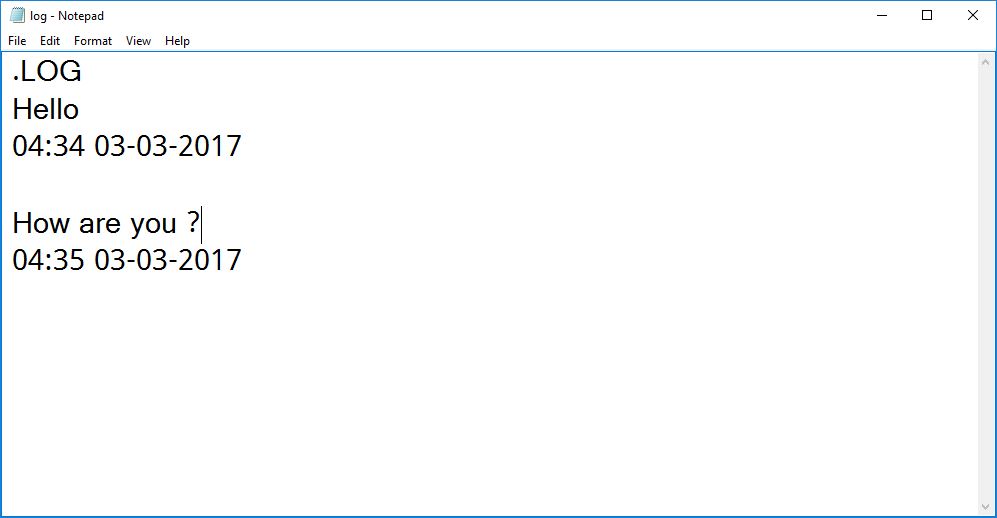
Yes, You can create a diary on Notepad. This Notepad trick will allow you to create Notepad note in such a format that whenever you edit your note, it will get saved with date and timestamp automatically. So here, Whenever you write and save file the date and time will automatically add at the end of your writing.
How To Create Diary on Notepad
- Open Notepad.
- Type .LOG in the first line.
- Save the file as Log.txt
- Now, Write something to the file and it will automatically get saved with edited date and time.
Create Fake Windows Errors with Notepad
This is very cool notepad trick that allows you to create Fake error messages. You can trick your friend by this hack very easily. Your friend will be feared by this trick as he/she will see an error message on his/her computer or laptop. You can create Fake error message with any message you want.
How to Create Fake Windows Error with Notepad
- Open Notepad.
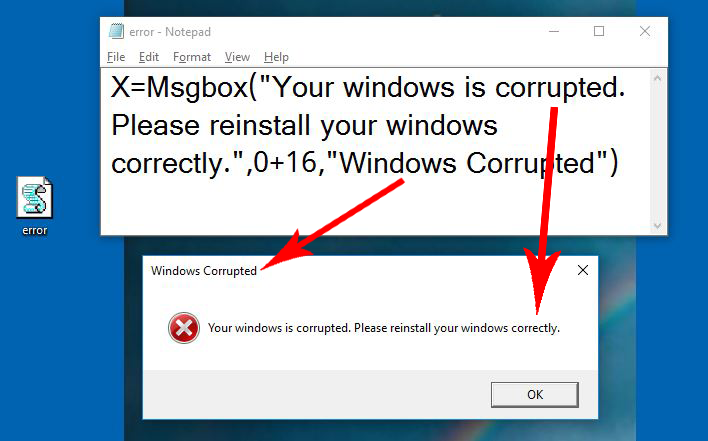
- Type X=Msgbox(“Message Here”,0+16,”Title Here”)
- Replace Message Here and Title Here with your Error Message and Error-Window Title respectively.
- Save the file with error.vbs.
- Now, Click the file and you’ll get your custom-made Windows error message.
Here, We have given example for “Windows Corrupted” error message.
Force Shutdown Your Windows
This Notepad trick will let you force shutdown your Windows in a single-click. So, If you don’t want to waste three clicks (Start >> Turn Off Computer >> Shut Down), this trick will help you in that. So, It will save your time also. However, You can make Shutdown or Restart button too. You can use this trick while your windows getting some problem or your mouse not working. So, you can force shutdown your windows with a single click.
How To Force Shutdown Your Windows
- Open Notepad.
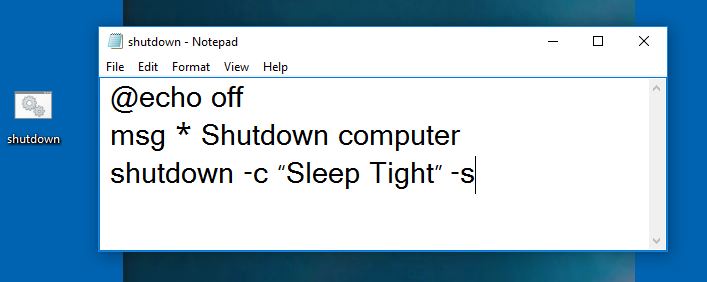
- Enter following code.
@echo off
msg * Shutdown computer
shutdown -c “Sleep Tight” -s
- Save the file with .BAT extension. For example, shutdown.bat
- Click on your file and it will automatically shutdown your Windows.
Make Your Keyboard LED Dance
Your keyboard has three LEDs above Numpad of Scroll Lock, Caps Lock and Num Lock. This Notepad trick will make those three LED continually on and off, creating dancing effects. It looks awesome to see that led dancing effect.
How To Make Your Keyboard LED Dance
- Open Notepad.
- Enter following code.
Set wshShell =wscript.CreateObject(“WScript.Shell”)
do
wscript.sleep 100
wshshell.sendkeys “{CAPSLOCK}”
wshshell.sendkeys “{NUMLOCK}”
wshshell.sendkeys “{SCROLLLOCK}”
loop
- Save the file as Dance.vbs
- Click the file and your all three LED lights will start dancing.
To stop it, You have to Shutdown or Log off your PC or Laptop.
Create Password Protected Folder using Notepad
You must be using some software to lock your some folders for privacy. But what if you can do that with the help of Notepad? Yes, Your simple text editor – Notepad can be used to lock your folders.
How To Create Password Protected Folder using Notepad
- Open Notepad.
- Copy the following code:
cls
@ECHO OFF
title Folder Secure
if EXIST “Control Panel.{21EC2020-3AEA-1069-A2DD-08002B30309D}” goto UNLOCK
if NOT EXIST Secure goto MDLOCKER
:CONFIRM
echo Are you sure you want to lock the folder(Y/N)
set/p “cho=>”
if %cho%==Y goto LOCK
if %cho%==y goto LOCK
if %cho%==n goto END
if %cho%==N goto END
echo Invalid choice.
goto CONFIRM
:LOCK
ren Secure “Control Panel.{21EC2020-3AEA-1069-A2DD-08002B30309D}”
attrib +h +s “Control Panel.{21EC2020-3AEA-1069-A2DD-08002B30309D}”
echo Folder locked
goto End
:UNLOCK
echo Enter the Password to unlock folder
set/p “pass=>”
if NOT %pass%== TricksNTech goto FAIL
attrib -h -s “Control Panel.{21EC2020-3AEA-1069-A2DD-08002B30309D}”
ren “Control Panel.{21EC2020-3AEA-1069-A2DD-08002B30309D}” Secure
echo Folder Unlocked successfully
goto End
:FAIL
echo Invalid password
goto end
:MDLOCKER
md Secure
echo Secure created successfully
goto End
:End
- TricksNTech written in bold is password. Change it to your own password.
- Save the file as secure.bat with File Type As All Files (*.*).
- Now, when you click secure.bat, it will create a Secure folder. Move your private files, documents, and folders here.
- Close Secure folder.
- Now, Double click on secure.bat, It will ask you to lock your folder. If you press “Y” then your folder will be hidden and if you press “N” then your folder will be as it is.
- So, After pressing “Y” your folder will be hidden. No one will be able to open the folder without the password.
- If you want to reaccess the folder then double click on secure.bat and it will ask you to enter the password to unlock the folder. So, Enter the password you have set in above file or if you have not set any password then enter TricksNTech.
- You can see the secure folder again.
Make Your Computer To Speak Your Sentence
Do you want to speak your computer or laptop as you want? Yes, It’s very simple. Here, Just write the sentence and your computer will speak that sentence. Cool na? Let’s do it.
How To Make Your Computer To Speak Your Sentence
- Open Notepad.
- Copy & paste this command.
Dim message, sapi
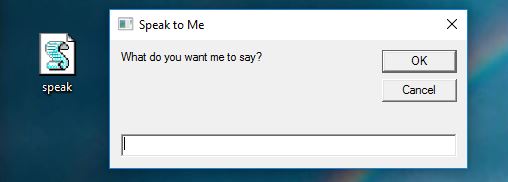
message=InputBox(“What do you want me to say?”,”Speak to Me”)
Set sapi=CreateObject(“sapi.spvoice”)
sapi.Speak message
- Save the file as speak.vbs.
- Double-click the file and it will open a prompt. Enter the sentence you want your computer to speak
- Click OK and Notepad will speak the sentence for you.
Make CD Drive Open & Close Again and Again
You want to prank your friend by showing him/her CD drive opening and closing continuously? Then this Notepad Prank will help you to do that. This simple notepad trick will work in PC only.
How To Make CD Drive Open & Close Again and Again
- Open Notepad.
- Enter the following command.
Set oWMP = CreateObject(“WMPlayer.OCX.7”)
Set colCDROMs = oWMP.cdromCollection
do
if colCDROMs.Count >= 1 then
For i = 0 to colCDROMs.Count – 1
colCDROMs.Item(i).Eject
Next
For i = 0 to colCDROMs.Count – 1
colCDROMs.Item(i).Eject
Next
End If
wscript.sleep 5000
loop
- Save your notepad file as cdopen.vbs
- Now, Open cdopen.vbs and it will start the process to continuously open and close CD drive.
To stop the process, Open Task Manager by pressing Alt+Ctrl+Del and stop cdopen.vbs process.
In PC, This notepad trick works like charm but in Laptop, You have to manually close the CD drive and it will open automatically as the laptop does not have an auto close function.
If you are getting an error like “Access is denied” as given below then, first of all, try to disable your antivirus temporarily and open cdopen.vbs. It will work.
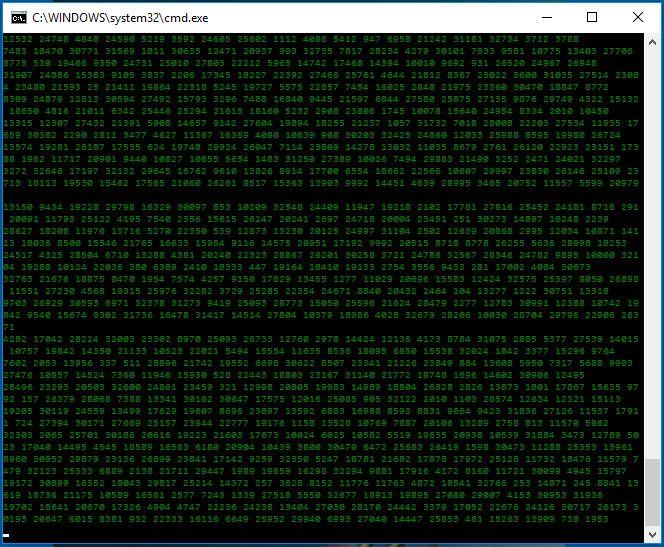
Create Matrix Raining Code Screen
Have you watched the movie, “Matrix”? You might have seen a string of green characters appearing on the screen randomly. In some movies, If they want to give an introduction of a hacker then generally they give this type of green characters string on the screen of PC or laptop. So, Do you want to make the same screen using notepad ? Then we will show you this simple notepad trick of matrix raining code screen.
How To Create Matrix Raining Code Screen Using Notepad
- Open Notepad.
- Type this command:
@echo off
color 02
:start
echo %random% %random% %random% %random% %random% %random% %random% %random% %random% %random% %random% %random% %random% %random% %random% %random% %random% %random% %random% %random% %random% %random% %random% %random% %random% %random% %random% %random% %random% %random% %random% %random% %random% %random% %random% %random% %random%
goto start
- Save the file as Matrix.bat
- Click on Matrix.bat and the show begins.
So, Here we have discussed 8 awesome notepad tricks and hacks. Now, Use these cool notepad tricks and amaze your friends. If you know any notepad tricks tips then share it with us in the comment section.



Hi, very good Article.
Thanks for sharing keep up the good work.
Timestamp is very useful i was not knowing that it can happen with notepad and the text align to the right side is very nice . thank you for great tricks…….